Tips / Practice / Speed control
Back around: check the speed before you hit harder
Compare speeds in the same layout and tell short, arriving and overrunning apart.
For beginners · about 20 min of practice · Based on a video by 웰컴스포츠
One thing to remember today
Not just softer: the speed that completes the path you need.
Written and edited by TTBoys · How we write and check sources · Report an error
웰컴 당구아카데미 deals with using more power than needed in back-around shots. Hitting softly is not the goal in itself. The goal is to find the speed that reaches the last ball after the cushions it needs. If the thickness and tip position change too, it is hard to compare the difference in speed alone.
1. Start with the original scene
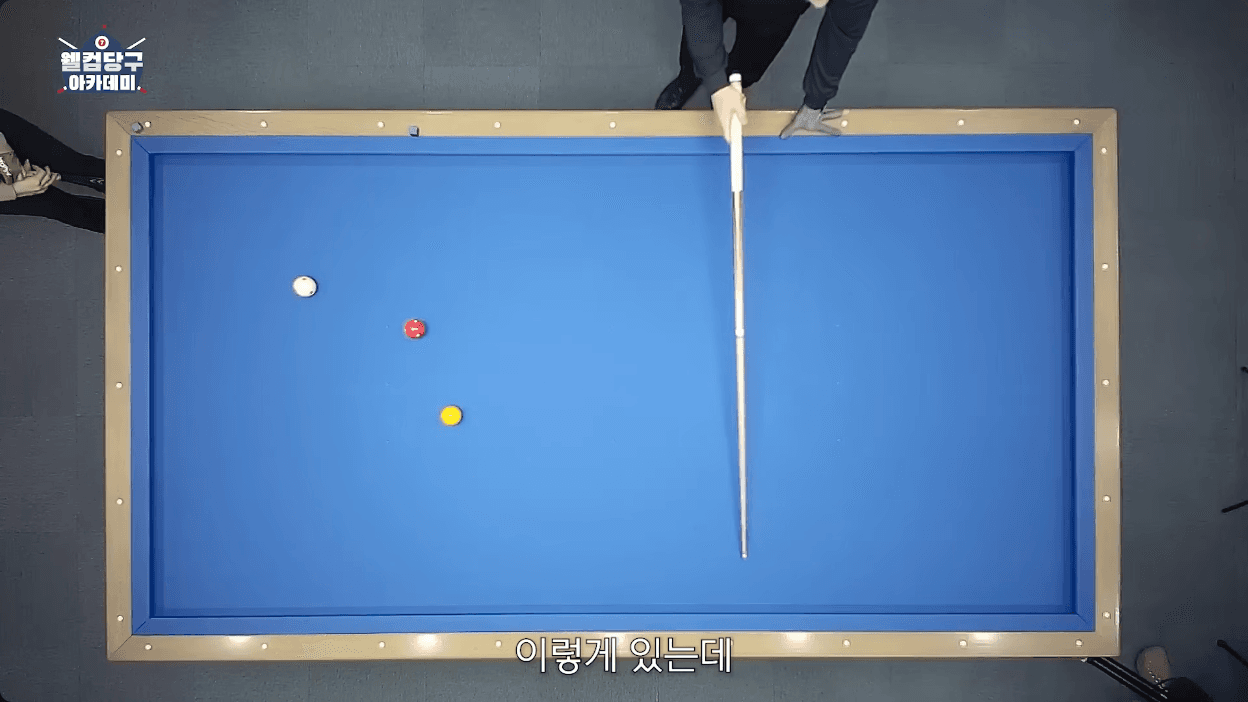
If playback is blocked or you want to see the scene again, watch from 4:00 on YouTube ↗
The scene buttons jump to the times we checked. Keep watching for the full explanation and the actual shot.
2. Sum it up in a diagram and check the conditions
- Layout
- The back-around example in the original. 7:00 and 8:10 are different layouts, so don’t read them together.
- Thickness and tip position
- Keep them fixed within a set you are comparing. Don’t estimate an exact thickness or number of tips from a still frame.
- Speed
- Compare your reference speed with one step slower. The point is not to go so slow that the ball cannot finish.
- Where to look
- Watch the entry into the first cushion and the speed near the last ball together. Don’t miss the first object ball’s movement either.
3. Follow the steps
Watch the original layout first
Tell the three balls at 7:00 apart, and in the explanation that follows, check the cue ball’s direction and the side the first object ball moves to.
Fix the layout and the aim
Note the ball positions relative to the rail points so you can remember them when you practice. If you changed the thickness or tip position, don’t group it into the same speed test.
Shoot at your reference speed first
At the speed you have been using, watch the first cushion and the area near the last ball. Look not only at whether you scored but at where the path changed.
Go one step slower and compare
Keeping the layout and aim, hit a set at slightly lower speed. Don’t add a new, forced stopping stroke at the same time.
Separate short distance from missing to the side
A ball that stops before arriving is different from one that misses to the side. Don’t change the thickness first because it stopped short, or add power first because it went wide.
If it isn't working, start here
You take “don’t hit hard” to mean always hit softly
The ball has to finish the path it needs. Check the final arrival speed and the path together.
You change the tip position while lowering the speed
That changes the conditions you are comparing. Group results that you observed with the same layout and aim.
A drill suggested by TTBoys
4. Two speeds, 5 shots each
Shots 1–5: repeat at your reference speed and write down the results.
Shots 6–10: keep the other conditions and compare at one step slower.
The speed you need depends on the cloth, balls and cushions. Don’t fix a particular number of rails or power as the right answer.
Record a shot as “done” when it follows the path you intended and reaches the last ball. Also write down where it stopped and how the speed felt.
Tap a number to cycle: not recorded → hit → needs work.
0/10 recorded · goal hit 0 times
Kept on this screen only. Copy anything you need before leaving or refreshing.
Related reading
Sources and what was checked
뒤돌리기 쎄게 치지마세요! | 웰컴 당구아카데미7 EP.03
웰컴스포츠 · Published 2026-03-23 · Checked 2026-10-10
We reviewed the speed-control topic in the creator’s description and the scenes at 4:00, 7:00, 7:10, 7:30 and 8:10. The diagram explains how to record speed; it is not a calculation of the actual collision path.
We checked the video description and the selected scenes. We did not verify the full transcript or measure anything on a real table. The steps, diagrams and 10-shot drill are TTBoys' editing and do not imply review or partnership by the creator.